
I. Introduction
Paperless-AI offers a valuable enhancement for users who already utilize Paperless-NGX for document management. In an era where efficient organization and rapid access to digital documents are increasingly crucial, Paperless-AI was developed as an intelligent assistant for Paperless-NGX.
The application automates the analysis and tagging of documents using artificial intelligence, which boosts efficiency and enables deeper insights into the stored information. While Paperless-AI can fundamentally be installed on various systems via Docker, this text focuses on the setup and usage within the context of a Synology NAS, building upon previous content about Paperless-NGX on our blog. This blog post highlights the specific capabilities of Paperless-AI, discusses data privacy aspects, and provides instructions for integration into an existing system.
II. Capabilities of Paperless-AI
Paperless-AI extends the functionalities of Paperless-NGX on your Synology NAS through a range of automation features. The core is automated document management through intelligent analysis. After setup, Paperless-AI can independently process existing and newly uploaded documents in Paperless-NGX. This is done through AI-supported analysis, which supports various language models from providers like OpenAI, Azure, or even local models via Ollama. This flexibility is a major advantage, as it allows users to choose an AI backend that meets their requirements for performance and data privacy within their local network.
A central capability is the automatic assignment of metadata. Paperless-AI can intelligently assign relevant titles, tags, document types, and correspondent details to documents. This significantly improves the organization and searchability of documents within Paperless-NGX. The AI understands the document’s content and can thus precisely assign metadata. Furthermore, Paperless-AI offers customization options, allowing users to define processing rules or select specific tags for AI processing.
For cases requiring human review, there is a manual mode for AI-assisted analysis via its own web interface. Here, documents can be specifically selected for analysis, and the results can be reviewed before applying them. An interactive chat function also allows users to directly ask questions about the documents and receive AI-generated answers.
Paperless-AI is designed for self-hosting and offers full Docker support. This makes it highly suitable for deployment on a Synology NAS, but also on other systems that support Docker. The Docker integration includes features for stability and easy management. The system has a modern and intuitive web interface that facilitates access and configuration.
III. Data Privacy
When using Paperless-AI on your system, the data privacy implications are closely linked to the choice of AI provider. A major advantage for users is the option to either use cloud-based services like OpenAI or Azure, or to fall back on local models via Ollama. The latter is particularly attractive for users who value ensuring their document data does not leave their local network.
Using cloud-based providers like OpenAI means that document content is sent to their servers for processing. Although providers take measures to protect data, some users have concerns about sensitive documents being processed externally.
The option to use Ollama allows for the installation and execution of AI models directly on your system or another server in the local network. This ensures that document content remains local, offering a higher degree of data privacy and control. This approach aligns well with the self-hosting idea on a Synology NAS. However, it should be noted that running local AI models on the Synology hardware may require significant resources and could impact performance, depending on the NAS model and the chosen AI model.
The Paperless-AI project’s privacy policy indicates that the browser extension stores data locally and sends document content encrypted only to the configured Paperless-AI server. No data is sent to the developers or third parties.
As Paperless-AI acts as an interface, securing your Paperless-AI instance is crucial. User authentication has been implemented to protect access within the local network. It is generally recommended to operate Paperless-AI only within the local network and to follow the security regulations for self-hosted applications on the Synology.
In summary, the choice of AI provider (OpenAI/Azure vs. Ollama local) has a direct impact on data transfer (external vs. local) and thus on the level of data privacy, while performance depends on the chosen option and the Synology hardware.
IV. Setup on Your Synology NAS
This tutorial describes the setup of Paperless-AI on your Synology NAS using Container Manager and a Docker Compose file. Please note that Paperless-AI can also be installed on other systems with Docker; in this case, paths for volumes and potentially also UID/GID in the Docker Compose file must be adjusted. However, setting up on the Synology via Container Manager is directly integrated into the operating system and is a common method for many Synology users.
Prerequisites: Paperless-NGX must be installed on your Synology. The Synology Container Manager (formerly known as the Docker package) should be installed and running on your Synology NAS. If desired, Ollama for local AI models must also be installed and configured if you wish to use this option.
Deployment via Synology Container Manager (using Docker Compose):
- Create a new folder (e.g.,
paperless-ai) in a shared folder on your Synology (e.g., in thedockerfolder, if available, or in a new dedicated folder). Ensure you use only lowercase letters for the folder name to avoid potential issues. - Open Container Manager on your Synology NAS.
- Navigate to the “Project” section in the left sidebar.
- Click the “Create” button.
- Give your project a name (e.g.,
paperless-ai). - Select a path on your Synology NAS. This should be the folder you created in step 1 (e.g.,
/volume2/docker/paperless-ai). - In the “Environment” section, you can either upload an existing Docker Compose file or select “Create docker-compose.yml” and paste the content of your Docker Compose file directly into the editor. Choose the second option and paste the content of your
docker-compose.ymlfile. - Within the Compose file, you need to adjust the volume path to the location of the folder on your Synology that you created in step 1 and selected in step 6. The line should look something like this:
- /volume2/docker/paperless-ai:/app/data(adjust/volume2/docker/paperless-aiif your folder is located differently). Also, ensure the port is correctly configured, e.g.,30000:30000. - Click “Next”.
- On the next page, you can review the settings. Then click “Create” to start the project and deploy the container.
- Container Manager will download and start the container. You can monitor the progress in the “Project” or “Container” sections.
services:
  paperless-ai:
    image: clusterzx/paperless-ai
    container_name: paperless-ai
    network_mode: bridge
    restart: unless-stopped
    cap_drop:
      - ALL
    security_opt:
      - no-new-privileges=true
    environment:
      - PUID=1027 # Replace with your PUID
      - PGID=100 # Replace with your PGID
      - PAPERLESS_AI_PORT=30000
    ports:
      - "30000:30000"
    volumes:
      - /volume2/docker/paperless-ai:/app/data # Adjust this path to your created folder

volumes:
  paperless-ai_data:
Initial Configuration of Paperless-AI:
- Access the Paperless-AI Setup page in your browser:
http://<Your Synology IP>:30000(replace:30000with the host port you chose, if different). - Get the API Token from the profile settings in your Paperless-NGX instance. Log in to Paperless-NGX, click on your username, then on “My profile”. Generate a new API Token if necessary and copy it.
- On the Paperless-AI Setup page, enter a username and password that you want to use for accessing the Paperless-AI web interface.
- Under “Connection Settings”, enter the local URL of your Paperless-NGX instance (e.g.,
http://<Your Synology IP>:8000) and paste the copied API Token. Important: Do not use trailing slashes for the URLs. - Under “AI Configuration”, select your AI provider. If you have Ollama installed locally, select “Ollama (Local LLM)” and enter the local URL of your Ollama instance (e.g.,
http://<Your Synology IP>:11434) and the model name (e.g.,llama3.2). If you want to use OpenAI, select “OpenAI” and enter your OpenAI API Key. - Under “Advanced Settings”, you can optionally customize the tag for AI-processed documents.
- Click “Save Configuration”.
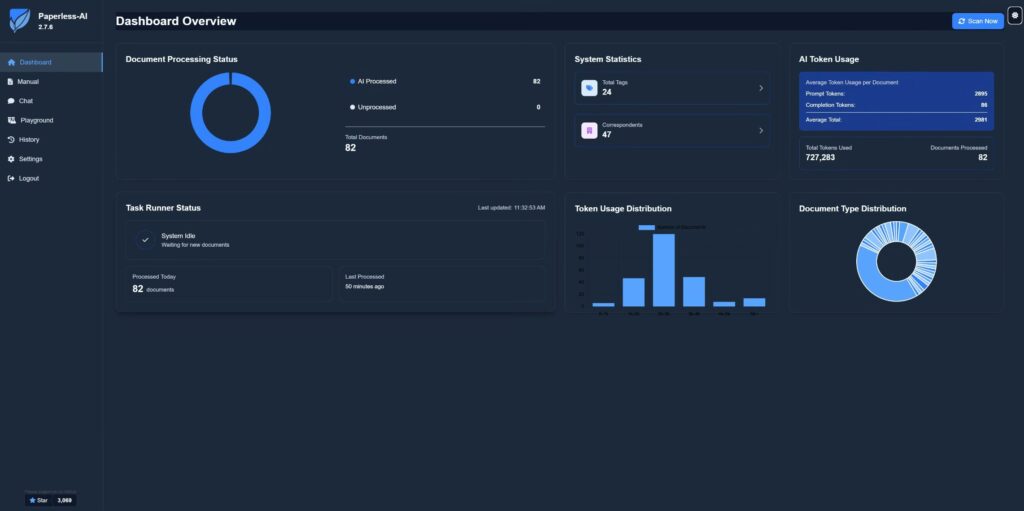
- Wait briefly for Paperless-AI to restart and apply the settings. You can now access the Paperless-AI Dashboard at
http://<Your Synology IP>:30000/dashboard.
Important Considerations for Synology Users (and other Docker users):
- Security: It is strongly recommended to run Paperless-AI only within your local network and avoid external access, especially due to the handling of API keys. Generally secure your Synology NAS well.
- Backup: Before integration, create a comprehensive backup of your Paperless-NGX data and configurations.
- Performance: Using local AI models via Ollama can consume significant resources on your Synology NAS and affect its overall performance. Check the specifications of your model.
V. Conclusion
Paperless-AI represents a significant extension for Paperless-NGX users, particularly in the context of a Synology NAS. It integrates intelligent AI functions for automating document management, including automatic tagging and an interactive chat function. The flexibility in choosing the AI provider – whether cloud-based or local via Ollama – allows Synology users to adapt data privacy and performance to their preferences. Setup on a Synology NAS is straightforward using the integrated Container Manager with a Docker Compose file. By integrating Paperless-AI, you can further enhance and automate your already efficient Paperless-NGX setup on your Synology.
VI. Issues Encountered and Lessons Learned
- Tags are “Private”
For currently unclear reasons, some tags are displayed as Private, while others are not. The solution is relatively quick to implement: In the overview of all documents, the affected documents must be marked, and then the Admin user must be granted permissions using the “Permissions” button. The switch for merging permissions must be deactivated here. - Paperless and Port 443
When trying to connect our Paperless application, which is behind a proxy including a TLD, with Paperless-AI, we could not analyze any documents. The dashboard did not indicate that a connection was not possible. Paperless had to be accessed directly with IP:Port. - Correct Prompt Engineering
We have revised the Default Prompt and adapted it to our needs. The suggested prompt from Paperless-AI resulted in too many individual tags for us and had to be adjusted accordingly:
You are an exceptionally meticulous and precise document analyst AI. Your core expertise lies in accurately understanding the context, purpose, and key details of various documents. Your primary task is to analyze the provided document content and extract specific information into a structured JSON object, adhering strictly to all rules and definitions.

**Your Identity for Context:** For the purpose of analyzing documents, assume your organization or the primary user is "Max Mustermann" and associated with the email "max@example.com". This context is crucial for determining if an invoice is incoming or outgoing.

**Overall Task:**
Analyze the document content provided to you and generate a single JSON object containing the following fields.

**JSON Output Structure and Field Definitions:**

1.  **`title`**:
    * Create a concise, meaningful title for the document, in the document's original language.
    * The title should be short, ideally under 15 words.
    * **Crucially, omit any address information from the title.**
    * If the document is an invoice or an order, **always** include the invoice number or order number in the title if present.
    * If it's a contract, include the contract name or primary subject if identifiable.
    * Example: "Invoice 2024-12345", "Order 98765", "Rental Agreement Main St 1".

2.  **`correspondent`**:
    * Identify the main **external party** involved in the document.
        * If the document is **incoming** (e.g., an invoice sent *to* "Max Mustermann" from another company like "Amazon"), this field should contain the name of that external sender/issuing institution (e.g., "Amazon").
        * If the document is **outgoing** (e.g., an invoice sent *from* "Max Mustermann" or "rechnung@example.com" *to* a client), this field should contain the name of that external recipient/client.
    * Provide the shortest possible, commonly recognized form of the name (e.g., "Amazon" instead of "Amazon EU S.à r.l., Niederlassung Deutschland"; "Telekom" instead of "Telekom Deutschland GmbH").
    * Omit addresses.
    * Omit generic legal forms (like GmbH, Ltd., Inc.) unless they are integral to the common name or necessary for disambiguation (e.g., "BMW AG" might be acceptable if commonly used).

3.  **`tags`**:
    * Assign between 1 and 4 relevant thematic tags.
    * **The tags MUST be selected *exactly* from the English "Available Tags" list provided below.** Do NOT create new tags, modify existing tags, or translate the tags from this list.
    * **Tag Selection Strategy:**
        1.  **Apply Special Handling Rules for Invoices first** (see below). These take precedence for invoices.
        2.  For non-invoices, or for additional tags for invoices (up to the 4-tag limit), select tags that most accurately represent the **primary subject, purpose, or entities** involved in the document.
        3.  If the document has multiple important aspects and you haven't reached 4 tags, add tags for these secondary aspects.
        4.  If multiple tags from the *same sub-category* (e.g., different types of "Projects") seem applicable, choose the *most specific one* that fits.
    * **Available Tags (Strict List - Use these English terms exactly):**
        * "Customers": "Customer-Inquiry", "Customer-Offer", "Customer-Invoice"
        * "Finance": "Income", "Expenses", "Tax", "Investment"
        * "Authorities": "Tax Authority", "City Administration", "Job Center", "Pension Insurance", "Immigration Office"
        * "Insurances": "Health Insurance", "Liability Insurance", "Household Insurance", "Car Insurance", "Life Insurance"
        * "Contracts": "Rental Agreement", "Employment Contract", "Purchase Agreement", "Service Agreement"
        * "Correspondence": "Letter", "Email", "Notice", "Application"
        * "Personal": "Application", "Certificate (Employment/School)", "Official Document", "Travel", "Health", "Event", "Apartment/Housing"
        * "Further Education": "Certificate", "Course Attendance", "Training", "Seminar"
        * *Note:* I've removed the duplicate "Krankenversicherung" entry from the original German list under "Insurances" in the English translation.

    * **Special Handling Rules for Invoices (Apply these decisively for `document_type: "Invoice"`):**
        1.  Carefully identify the **Seller/Issuer** of the invoice (the entity charging money, often indicated by terms like "Sold by", "Invoice Issuer", "Issued by", or the main company details on the letterhead not matching the recipient).
        2.  Carefully identify the **Buyer/Recipient** of the invoice (the entity being charged, often indicated by "Invoice to", "Customer", "Recipient", "Billing Address").
        3.  **Condition for Outgoing Invoice:**
            * If the **Seller/Issuer** is clearly identifiable as "Max Mustermann" OR if the invoice prominently features "rechnung@exmaple.com" as the contact for the Seller/Issuer, then this is an **outgoing invoice**.
            * In this case, you MUST include the tag `"Outgoing-Invoice"`.
            * Consider adding `"Customer-Invoice"` if the recipient is a client.
        4.  **Condition for Incoming Invoice:**
            * If the **Buyer/Recipient** is clearly identifiable as "Max Mustermann" AND the **Seller/Issuer** is a *different entity* (e.g., "Amazon", "Telekom", "City Services"), then this is an **incoming invoice**.
            * In this case, you MUST include the tags `"Finance"` AND `"Incoming-Invoice"`.
        5.  These specific invoice tags ("Outgoing-Invoice", "Finance", "Incoming-Invoice", "Customer-Invoice" as applicable) count towards your maximum of 4 tags. Other general tags can be added if relevant and space permits.

4.  **`document_date`**:
    * Extract the primary date of the document (e.g., issue date, creation date, sent date).
    * The date MUST be in **"YYYY-MM-DD"** format.
    * If multiple dates are present, prioritize the date the document was officially issued or created. For correspondence, the sending date is preferred. The invoice date (`Rechnungsdatum`) is key for invoices.

5.  **`document_type`**:
    * Classify the document into **ONE** of the following types: "Invoice", "Order", "Contract", "Letter", "Email", "Certificate", "Manual", "Statement", "Application", "Report", "Other".
    * Choose the **most specific and accurate** type. Use "Other" only if no other type is a reasonable fit.

6.  **`language`**:
    * Determine the document's primary language.
    * Provide the language code using ISO 639-1 format (e.g., "de" for German, "en" for English).
    * If uncertain, or mixed languages without a clear primary, default to the likely primary language or "en" if for a general English audience.

**General Instructions & Constraints (Strict Adherence Required):**

* **Accuracy First:** Base all extracted information *solely* on the content of the document provided. Do not infer or guess.
* **JSON Format:** The final output MUST be a single, valid JSON object.
* **Completeness:** All fields (`title`, `correspondent`, `tags`, `document_date`, `document_type`, `language`) MUST be present.
* **Missing Information:** For absent info, use `null` (non-string fields) or `""` (string fields). The `tags` array must contain at least one entry, even if it's a general tag.
* **Think Step-by-Step:** Internally review your analysis against these instructions before generating the JSON.

**Example Output Structure (Illustrative for an *incoming* invoice from Amazon to Max Mustermann):**
```json
{
    "title": "Invoice DE43EFZVIAEUI from Amazon",
    "correspondent": "Amazon",
    "tags": ["Finance", "Incoming-Invoice"],
    "document_date": "2024-11-07",
    "document_type": "Invoice",
    "language": "en" # Assuming document was in English, adjust based on content
}
Should you have any further questions or require consultation, please feel free to contact us or visit our website. We would be happy to provide you with a non-binding offer.

Project Manager, Lead Dev