As Proxmox is becoming increasingly popular and widespread as a hypervisor, users often face the question: how do I migrate a VM from my hypervisor to Proxmox. The procedure is usually very similar, but there are still differences to be aware of. Here, one way of moving is presented. Of course, the operating system of the VM to be moved also makes a difference; while the migration of Linux can be carried out relatively smoothly, Windows often requires some post-processing. For Windows VMs, it is worthwhile to install the VirtIO drivers and the Qemu Guest Agent under Hyper-V so that they are already available under Proxmox. The following describes how the migration from Hyper-V to Proxmox succeeds.
Export the VM in Hyper-V
The first step is always the same, regardless of the operating system:
First, the VM to be migrated must be exported. To do this, right-click on the corresponding VM and then select export.
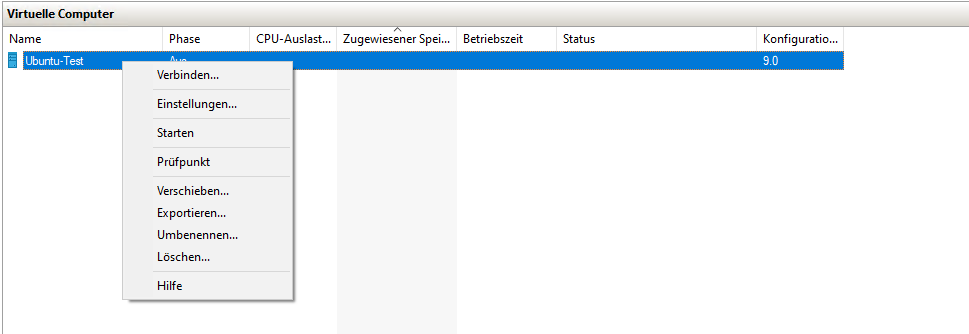
IMPORTANT: There must be no checkpoints for the VM, otherwise a boot process under Proxmox is not possible.
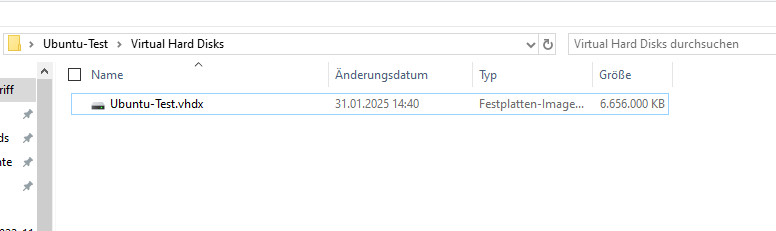
Select a storage location for the files; you should then have, among other things, a folder “Virtual Hard Disks”. This contains a .vhdx file, i.e., the virtual hard disk of the VM.
Import the VM into Proxmox
First, create a new VM in Proxmox. Select the appropriate operating system under OS, since we are not reinstalling an operating system, choose “Do not use any media”. In the Disks tab, click the trash can icon next to the default disk to create a VM without a disk.

Adjust the settings for CPU and memory to the requirements of the VM on Hyper-V. The network settings must be adapted to the new Proxmox environment.
Now, first copy the hard disk file of your VM to the Proxmox server, preferably directly into the directory of the newly created VM. This is usually /var/lib/vz/images/, or if the VMs are on their own storage pool, /mnt/pve/<storage-pool-name>/images/<vm-id>. You can use scp to copy, the command might look like this:
scp Ubuntu-test.vdhx root@pve01:/mnt/datastore/images/100
Conversion from vhdx to qcow2 or raw
Now the vhdx file must be converted into a suitable format. For local storage pools, qcow2 or raw are available. The raw format offers better performance but is storage inefficient as it occupies the entire allocated size. With qcow2, the actual size grows with the required storage up to the set maximum. Additionally, raw does not support snapshots, which is very practical for production environments. Depending on your requirements, both formats are valid options.
First, switch to the directory of the newly created VM. The command to convert to the qcow2 format in this example is:qemu-img convert -f vhdx -O qcow2 Ubuntu-test.vhdx Ubuntu-test.qcow2
Or generally:qemu-img convert -f vhdx -O qcow2 image.img image.qcow2
After the conversion, you should check for errors with qemu-img check <filename>.

Subsequently, the hard disk can be read with the command qemu rescan --vmid <vmID>. The hard disk then appears in the GUI as “Unused Disk”. You may need to adjust the boot order in the options. After that, the VM can be started.
Final Adjustments
Depending on the operating system, you may need to make a few more changes:
For Linux VMs, the name of the interface may need to be adjusted, and if not already done, the Qemu Guest Agent should be installed.
The same applies to Windows, but it is important to install the VirtIO drivers, which you can download here, if not already done.
In Windows, it may also be necessary to switch the BIOS to OVMF (UEFI) in the hardware options.
Conclusion
The migration of a Linux VM from Hyper-V to Proxmox is usually smooth. However, challenges can arise with Windows VMs. The Proxmox forums offer numerous solutions for common problems.
You can find more interesting articles in our Blog, now also in English.
Or contact us if you have any questions.