
What is Paperless-ngx?
Before we dive into the installation and configuration, let’s briefly explain what Paperless-ngx is. Paperless-ngx is an advanced, web-based document management application designed to help you achieve a paperless office. It offers a range of features to efficiently organize, index, and make scanned documents searchable. Here are some key features:
- Organization: Manage your documents with tags, correspondents, types, and more.
- OCR (Optical Character Recognition): Adds searchable and selectable text to your documents, even image-based ones, thanks to the use of the open-source Tesseract engine, which recognizes more than 100 languages.
- Long-term Storage: Documents are stored in PDF/A format, designed for long-term archiving, along with the unaltered originals.
- Machine Learning: Automated tag assignment, correspondents, and document types.
- Support for Various Formats: Processes PDFs, images, text files, Office documents, and more.
- File Management: Stores documents directly on the hard drive; file names and folder structures are freely configurable.
- Modern Web Application: With customizable dashboard, filter functions, bulk editing, drag-and-drop upload, customizable views, supports custom fields and public links with optional expiration time.
- Full-text Search: With autocomplete, relevance sorting, and highlighting.
- …and much more
With these features, Paperless-ngx is an ideal solution for managing and archiving digital documents, both for individuals and businesses.
Download
Now that we understand what Paperless-ngx is, let’s start with the download and installation on your Synology DSM 7.2 Container Manager.
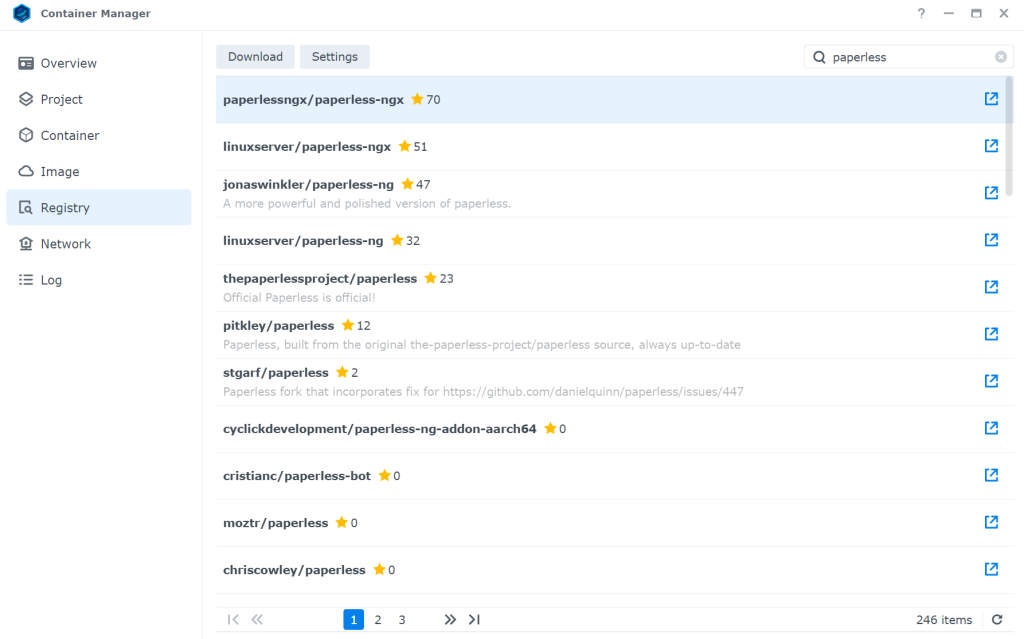
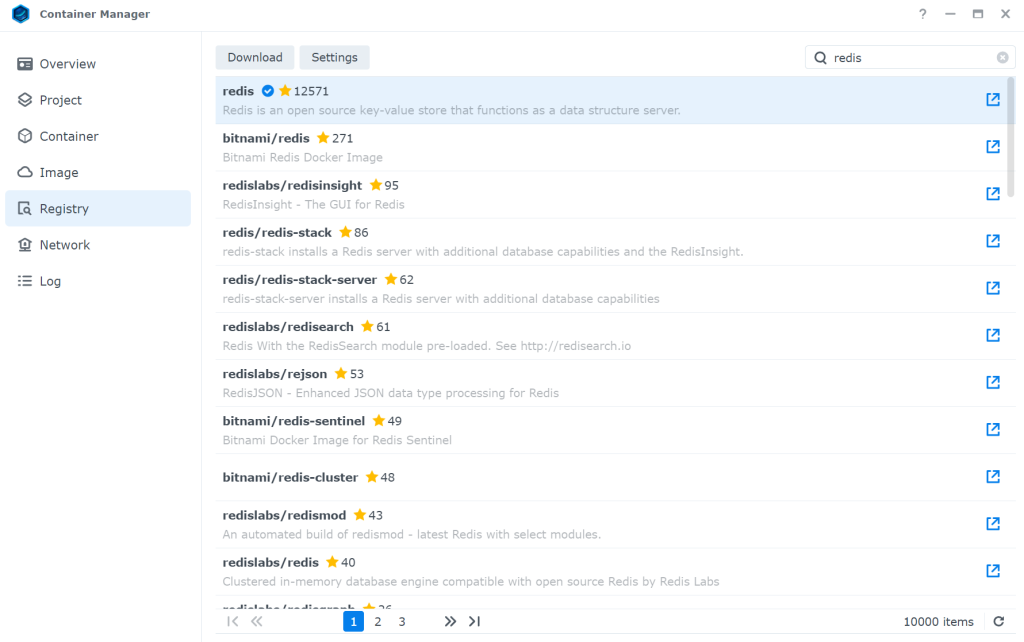
First, you need to download the packages for Redis and Paperless-ngx in the Container Manager under the “Registry” tab.
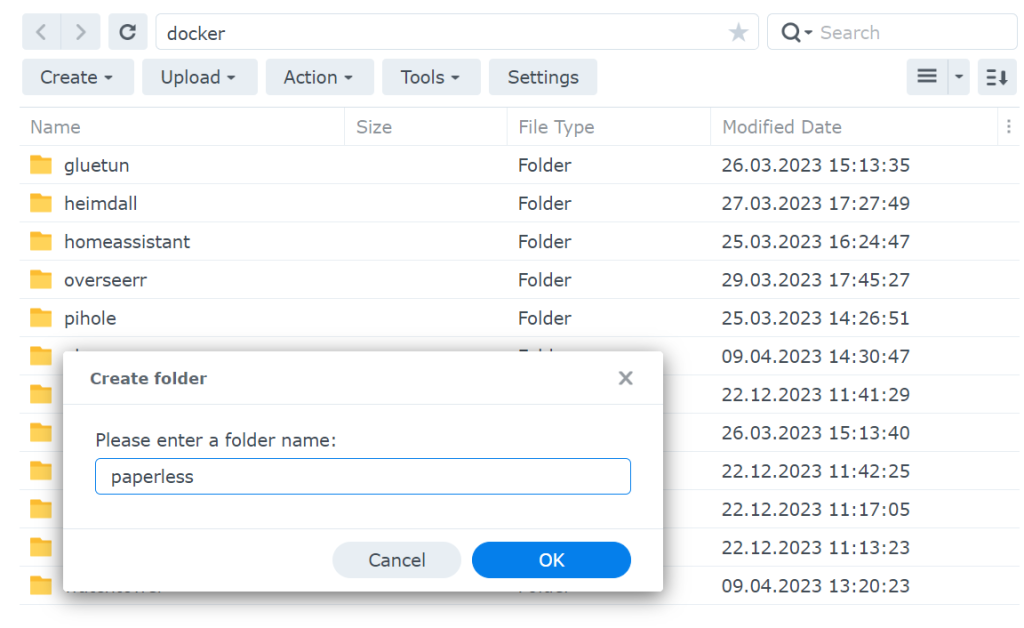
Create Paperless Folder in Docker Directory
Redis Installation
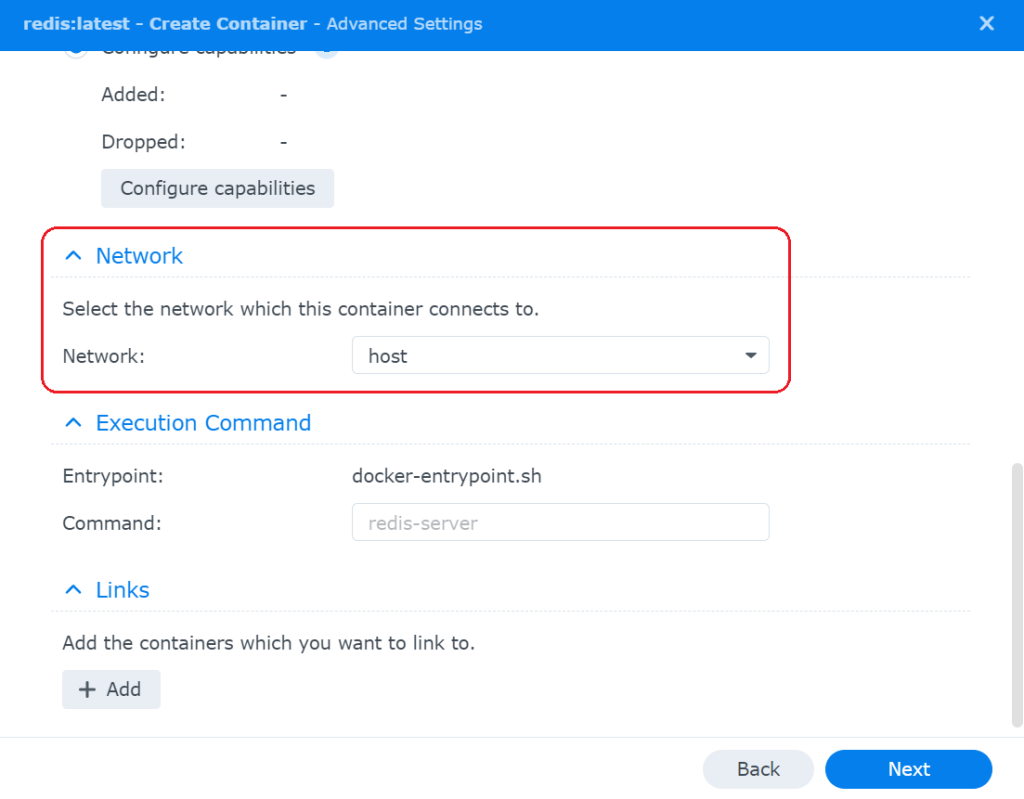
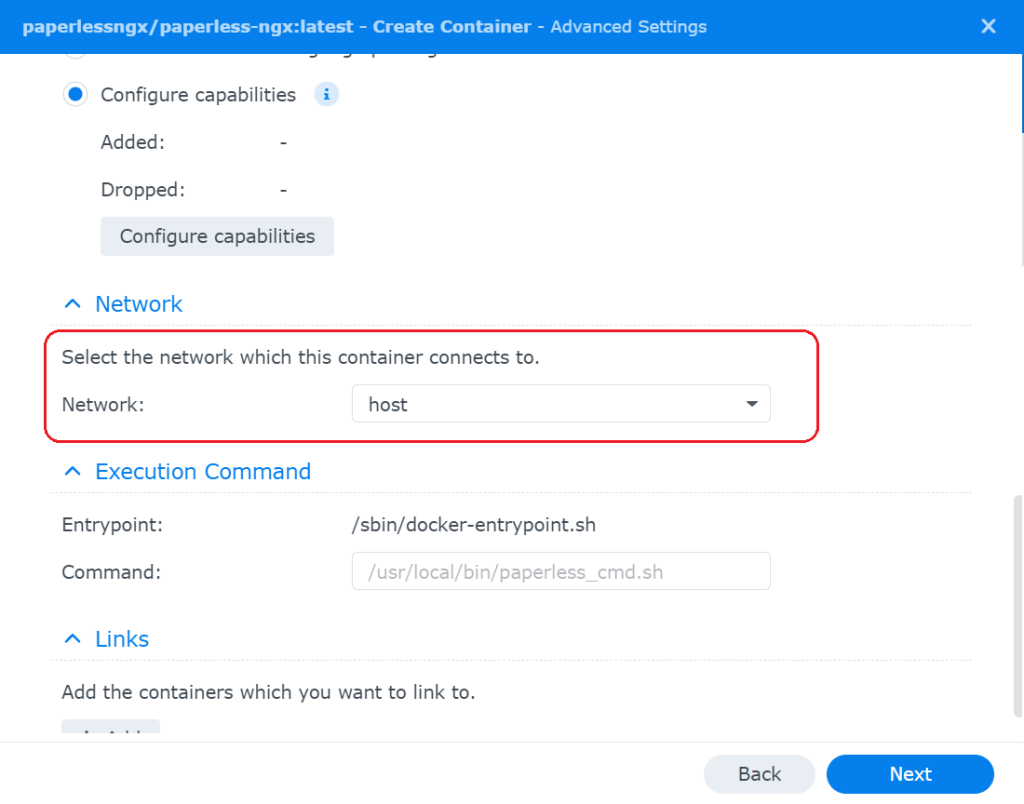
In the “Image” tab, click on the Redis package and then click Run at the top. The only settings that need to be changed here are in the “Network” area.
Paperless-ngx Installation
Start the installation process just like with the Redis package. However, some adjustments need to be made here:
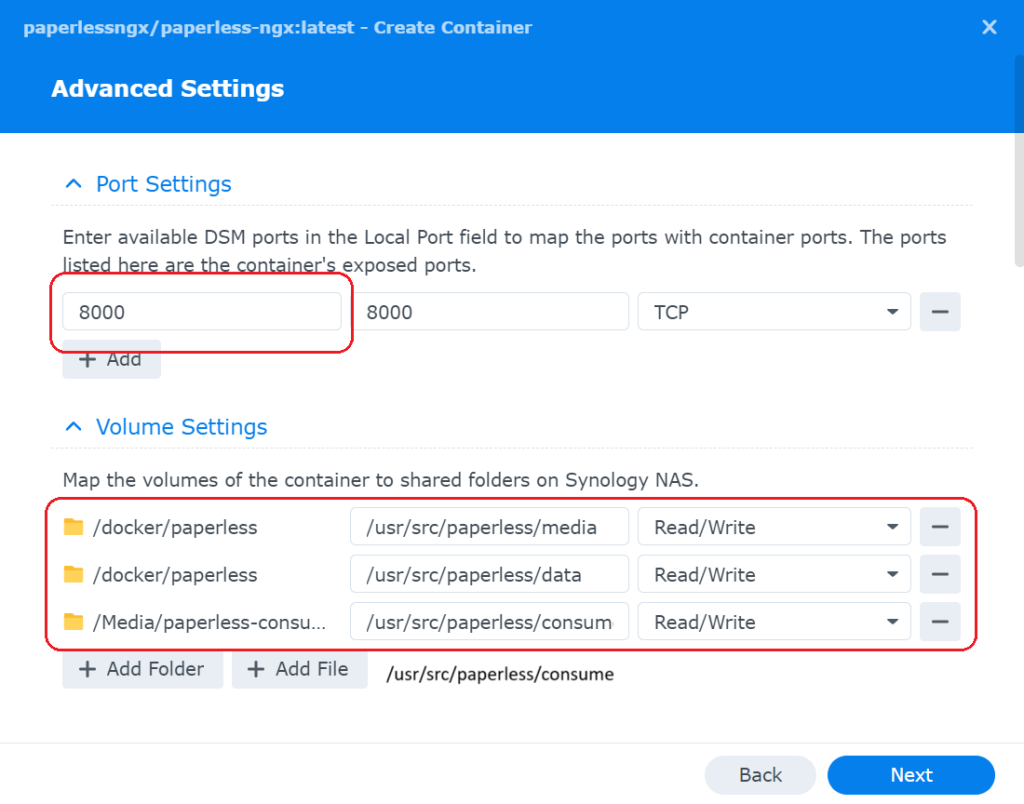
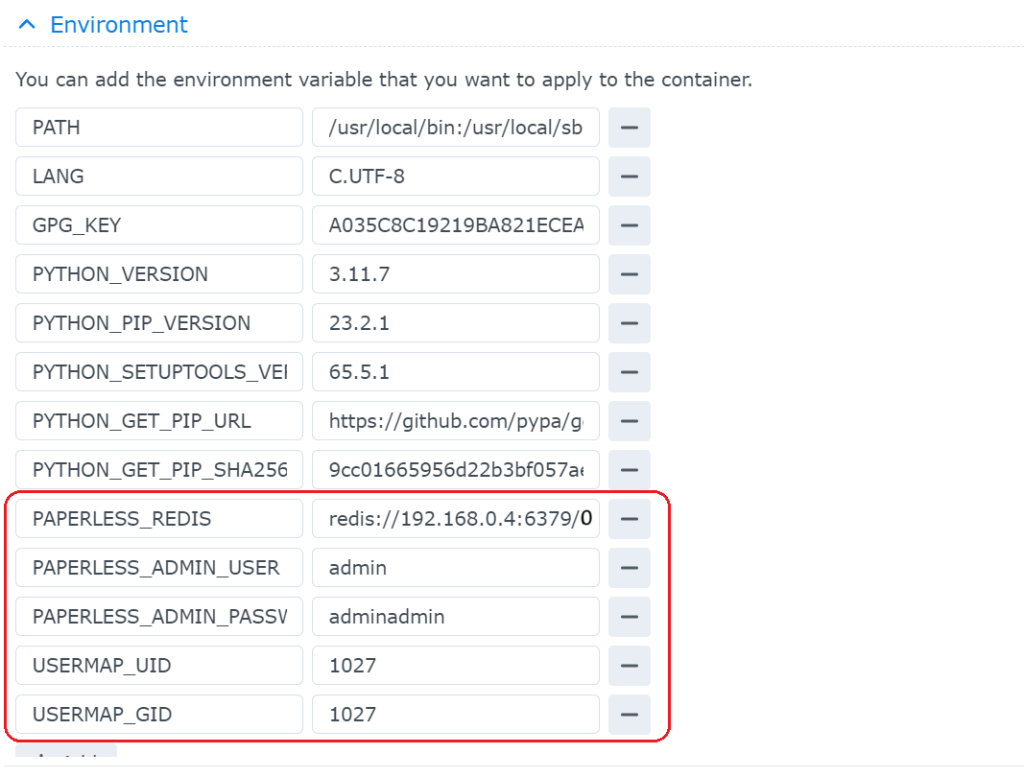
The Redis IP address must be the IP address of the Synology.
UID and GID must be those of the Docker user. Here is a short guide on how to connect via SSH and find out the Docker user ID and group ID:
- Enable SSH on your Synology NAS via the Control Panel.
- Connect using an SSH client like PuTTY or a terminal.
- Use the command id to obtain the UID and GID.
Continuing with the installation:
Starting Redis and Paperless-ngx
After installing Redis and Paperless-ngx, start Redis first and then Paperless-ngx.
Configuration of Paperless-ngx
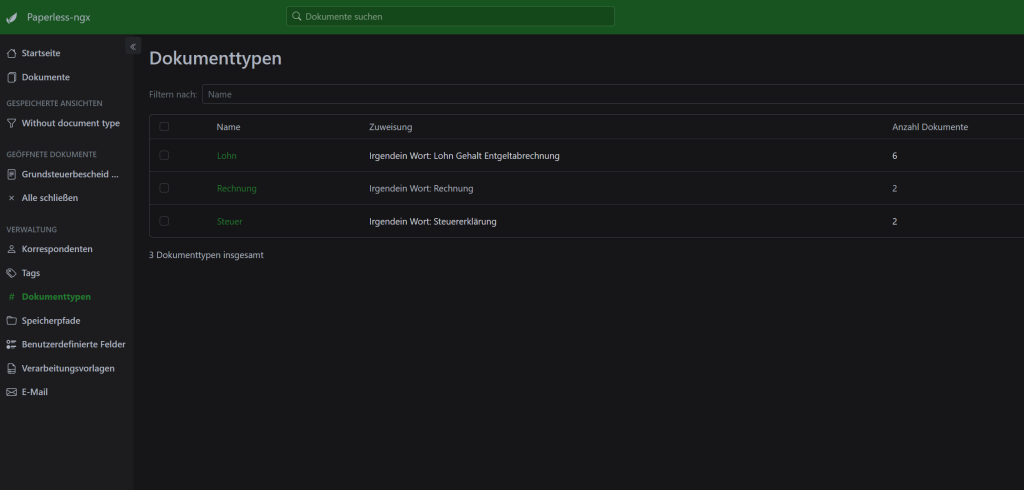
Open Paperless-ngx by entering IP_OF_NAS:8000 in the browser. Log in and set up the desired document types, for example, as shown in this screenshot:
Uploading Files
You can now start uploading files. The assignment of document types may not work immediately. You can start with manual tagging, and over time, the automatic assignment will work (or you can add some keywords yourself).
Additional: Google Drive for Automatic Scanning and Alignment of Documents
About four weeks ago, Google Drive for Android underwent a significant update, including a redesign of the document scanner interface with additional features. This update not only brings a new homepage and other UI adjustments but also an improved experience when scanning documents.
The scanner is launched via the dedicated camera button that appears above the rectangular “New” button. Previously, this would take you to the standard camera app, but now a custom viewfinder opens with “Google Drive” branding at the top and simplified controls. Notably, there is an “Auto-Capture” mode next to the “Manual” mode, which automatically takes the photo once everything is properly aligned.
Setting Up Cloud Synchronization
- Install “Cloud Sync” via the Package Center on your Synology NAS.
- Connect to your Google Drive account.
- Select the target folder in Google Drive and the local folder (the Consume folder we linked when creating the Docker package) on your NAS for synchronization.
Additional: “paperless CSRF verification failed. Request aborted.”
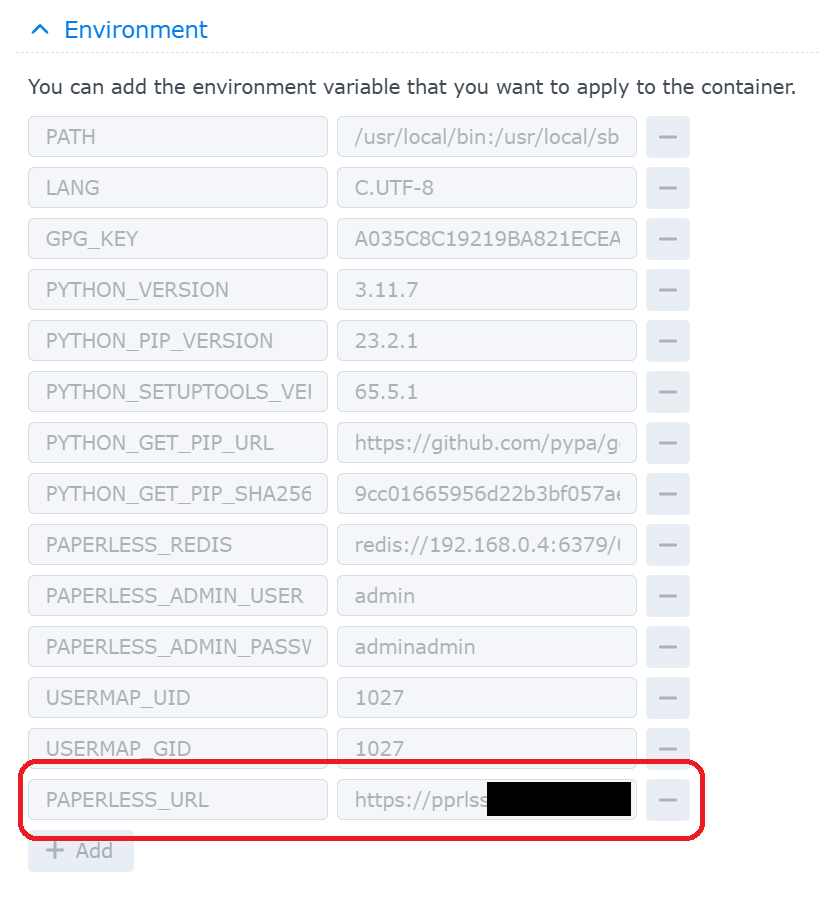
If you want to use Paperless behind a reverse proxy, for example, to use the mobile app, you need to add the following value in the container settings:
If you have any questions or would like a consultation, feel free to contact us or visit our website. We would be happy to provide you with a non-binding offer.

Project Manager, Lead Dev